

The Support Ticket workflow helps handle and log all support issues.
Using the Support Ticket workflow
Note:
The first three steps should be filled out by the User with the IT problem and they should choose their company as the Client, and their name as the Client Staff.
- Click Tasks to navigate to the Dashboard, then click + Create New Task.
- Choose a Client and Client Staff and click Create Task.
- Choose the Support Ticket Workflow and click Add Task.
- Fill out the required fields and click Save. This will update the Task status to Request Received.
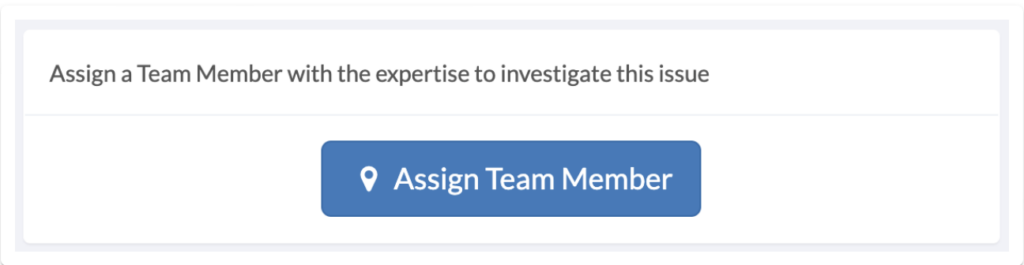
- Click the Assign Team Member button and assign a Team Member to resolve the ticket. This will update the Task status to Staff Assigned.
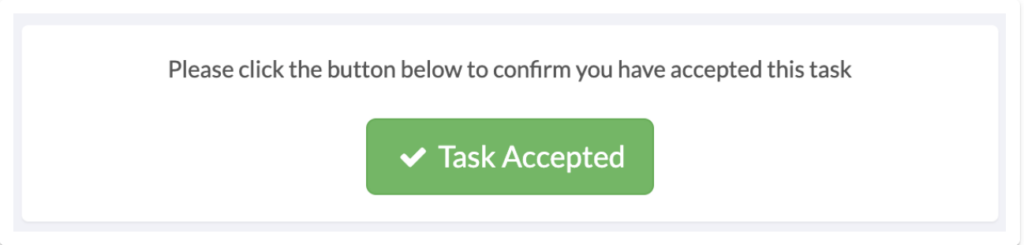
- Now that the User has been assigned, they can go to the Task page and click the green Accept Task button. This will update the Task status to In Progress.
- If the User does not accept the task they can click on the red Task Declined button. This will return the Task status to request received and you will have to reassign a User by following step 5.

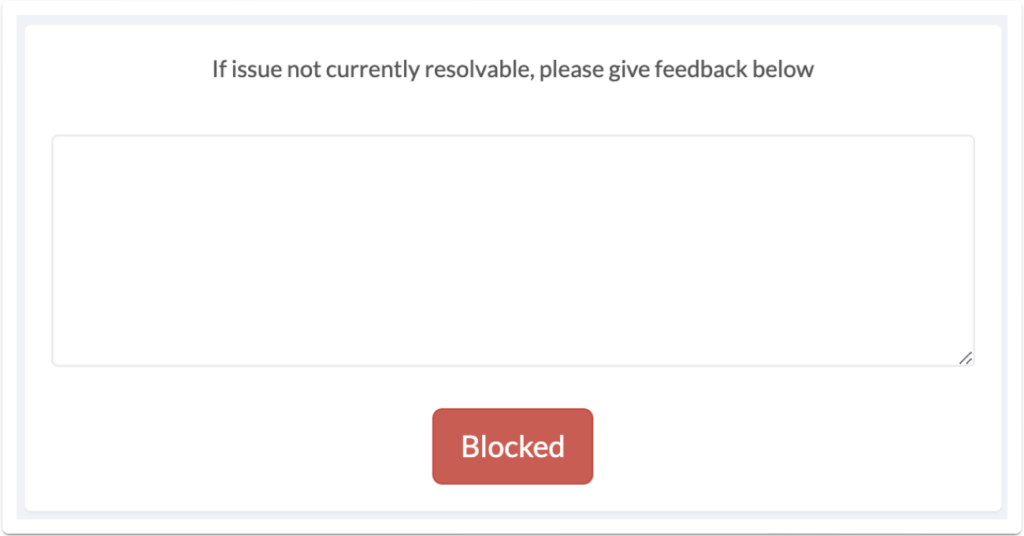
- If there is an issue stopping the request from proceeding, the User can enter the details in the blocked box and submit the details by clicking the red Blocked button. This will update the Task status to Blocked. If the status is changed to Blocked it will require you or the User to provide notes on the issue in the box provided on the Task page.
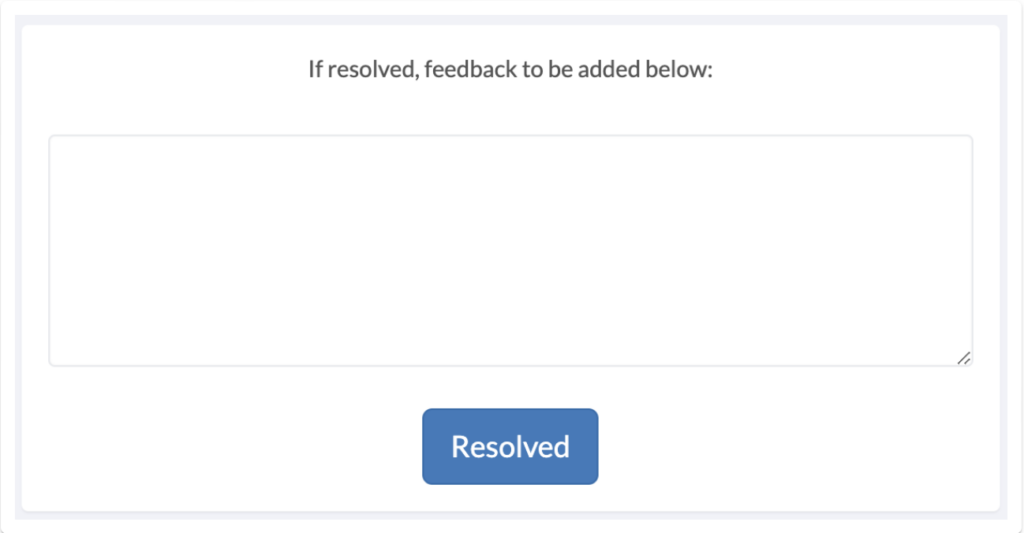
- Once the issue has been resolved, return to the Task page and provide feedback and click the blue Resolved button. This will update the Task status to In Progress. If the issue is yet to be resolved, provide feedback and click the red Blocked button. You can repeat this process until the issue is resolved.
- The User will then have to confirm the ticket was completed by clicking the green Issue Resolvedbutton. If the User does not confirm that the issue is resolved and has been completed for four days, the ticket will automatically close.
