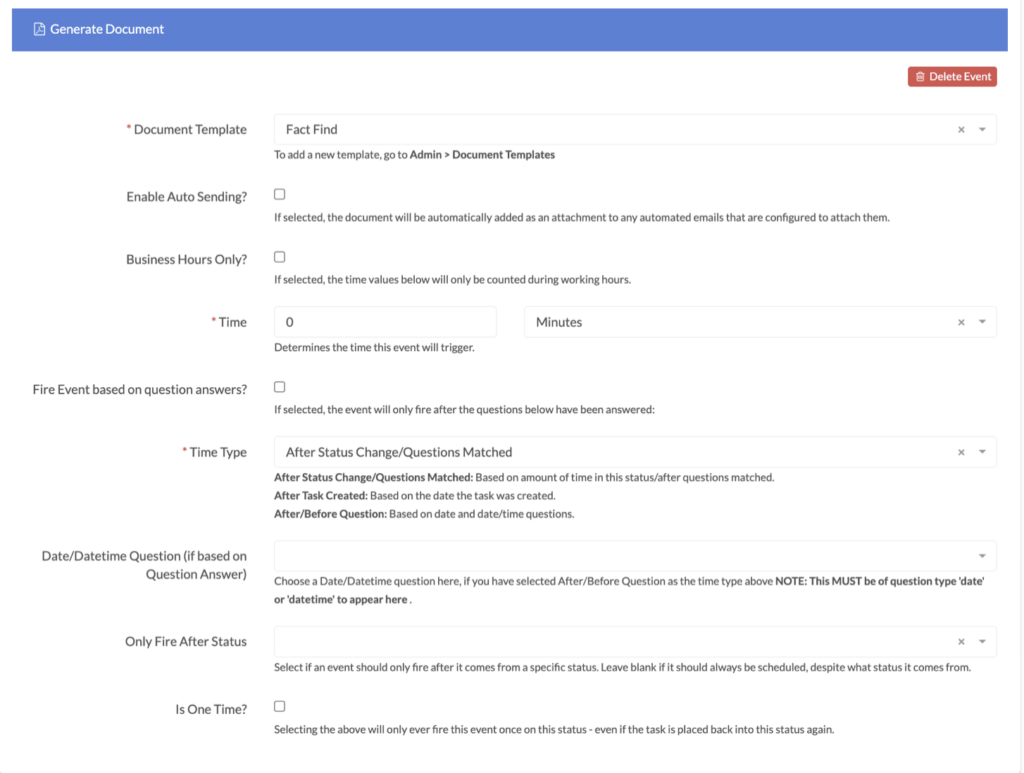
The Generate Document automated event can be used to generate a document automatically. You can set specific triggers, so the document will generate once set requirements are met.
Adding a Generate Document Automated Event
- Click on the Automated Event tab on the Status you want the document to generate from.
- Drag and drop the Document Generation automated event onto the blank space on the right.

Select a template from the Document Document dropdown box. To learn how to create document templates, view our guide.
Check the Enable Auto Sending checkbox if you want the document to be automatically added to any automated emails set up to attach them.
Check the **Business Hours Only?**checkbox if you want the Document to only generate during business hours.
Determine the time the event will trigger using the Time boxes.
Check the Fire Event based on question answers? box if you want a question(s) to trigger the Document Generation. Checking this box will then display fields for you to add questions and specify any answers.
In the Time Type box, choose rules about when the Document will generate:
- After Status Change/Questions Matched: Based on the amount of time in this status/after questions matched.
- After Task Created: Based on the date the task was created.
- After/Before Question: Based on date and date/time questions.
Choose a Date/Datetime Question, if you selected After/Before Question as the Time Type. Note: this question must have the question type date or datetime to appear as a Date/Datetime Question option in the dropdown.
If the Document should only generate after coming from a specific status, enter this status in the Only Fire After Status box.
Check the Is One Time? checkbox if you do not want the Document to generate more than once, even if it is placed back into this status again.
Check the **Should this event trigger when created as a child task?**checkbox if you want the Document to generate when the workflow is created as a child task.

